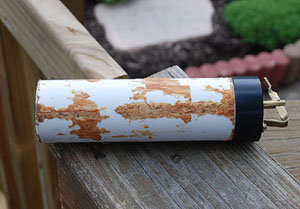
Daye drones made before mid 2010 have a mainstock finished with a vinyl artificial leather cladding, fastened with contact cement. The contact cement proved to have a limited lifespan. The edges of the seam where they meet along the normally unseen underside of the mainstock tube begin to curl and open apart, which is unsightly. All our plastic mainstocks are now made with a varnished hardwood veneer. It too is fastened with contact cement, but since the cover is a natural wood, it's suitable for more common contact cements which have the benefit of proving to dry and harden more completely.
|
|
You can replace the vinyl with a wood veneer on your mainstock relatively easily. We sell veneer pieces cut to size for this purpose so that you don't need to buy several square feet. Here is an illustrated description of me replacing my personal mainstock vinyl.
 |
 |
 |
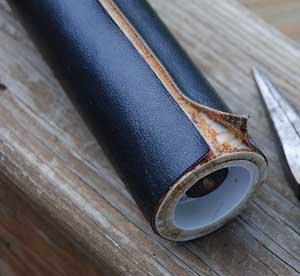
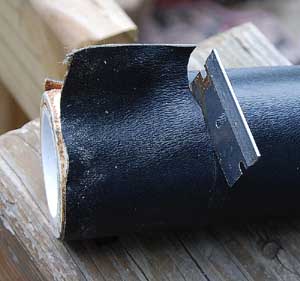
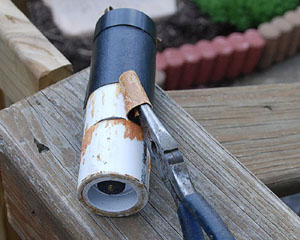
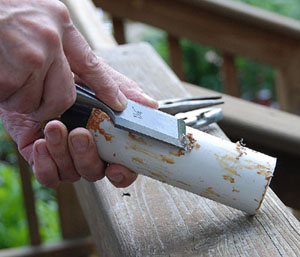
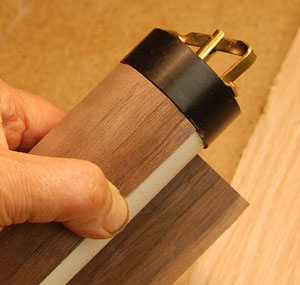
The vinyl is sliced with a sharp knife or razor blade all the way around the mainstock, 1 to 2 inches beyond the end of the mainstock. This makes it easier to peel the cover away. Grip the lifted end of the seam in narrow pliers, squeeze and then roll to pry the material off the mainstock. Do this in small strips that are easy to pull, until the entire cover has been removed. This takes about 5-10 minutes.
 |
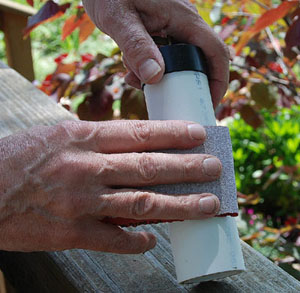 |
The contact cement under the vinyl retains some softness, so it can be eventually removed with some scraping. It's probably better to use a paint scraper than a good wood chisel! Be careful not to gouge the plastic into an uneven surface. Scratches won't hurt but pits and troughs will leave the wood veneer vulnerable to cracking in spots. The cement is slightly soluable in acetone, but not enough to easily remove the thick buildup that will be left over much of the stock. Once you've scraped almost all the goo away manually, which takes perhaps 10-15 minutes, acetone can help clean away the remainder. If you don't have acetone (sold at paint & hardware stores, also used as nail polish remover), rough sandpaper will eventually do it. The cement will quickly clog paper so you may need to use several sheets. It's probably a good idea to leave the entire surface of the plastic sanded with medium to rough sandpaper to be certain all the old contact cement chemistry is removed.
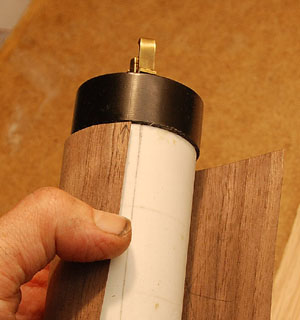
When we make our mainstocks, the tube is clad in its covering before the delrin socket end is attached. If you are able to remove your socket end easily, the veneer can be bonded with a bit of length extending beyond each end of the tube. In this case no special care is needed for orienting the veneer except to be reasonably straight.
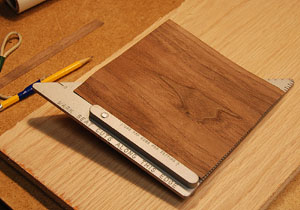
Veneer is sold either in pure wood form or with a paper reinforcing backing. The veneer used here is all wood but if yours has the paper backing, be sure it's the paper side you glue.
 |
 |
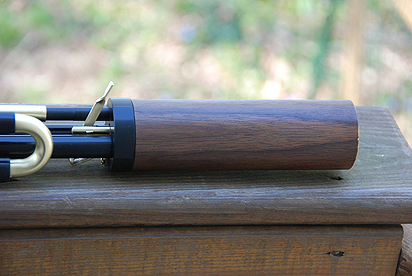
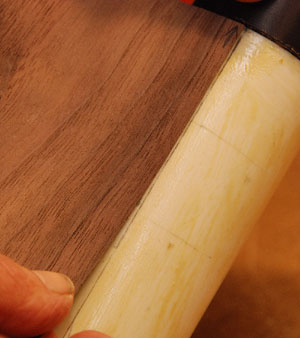
But in most cases, the socket end is permanently glued on, which means the end of the veneer needs to line up neatly with the socket end of the tube against the black delrin piece. The seam needs to be along the underside of the stock when playing so that it's not visible. Note in the photograph that the seam aligns with the screw mounting of the switch-valve lever. A good way to ensure this is to make a test mounting of the veneer, using easily-removed tape to hold the covering tightly in position. Be sure the outer edge of the veneer is snug against the socket end. Then run a pencil mark on the white plastic tube along one of the seam sides where the ends join.
 |
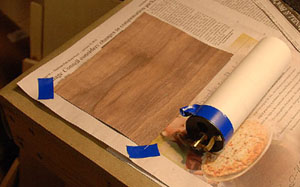 |
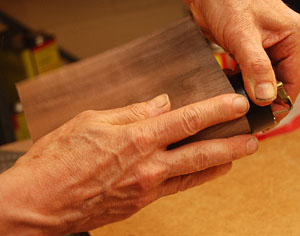
Wrap the delrin socket end with tape to protect it from glue, and to give you a place to hold the stock for gluing without spoiling the finish with glue that might get onto fingers. Tape the veneer to a gluing table over protective newspapers. Don't use tacks because they'll split the veneer. Tape only the 2 corners of the end of the wood that will extend slightly beyond the valve end. Don't mask the corners at the end that lies next to the delrin socket end (with the lever) because all of that end will remain on the finished mainstock and needs to be firmly glued at all points.
 |
 |
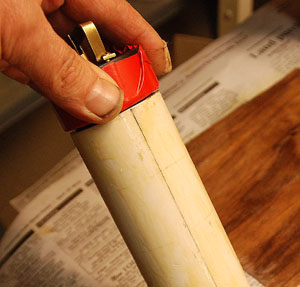
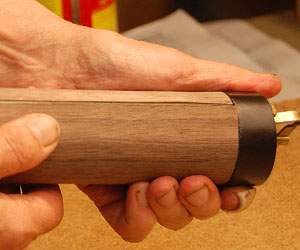
Coat the veneer and the mainstock, and let the contact cement dry for the time specified in the glue's instructions. Line up the veneer against the edge of the socket end and your pencil alignment guideline, and carefully lay the edge down along the pencil line. Then slowly wrap the veneer the rest of the way around the tube. Press from the line moving gradually around the tube, taking care not to let the veneer wrinkle or twist.
 |
 |
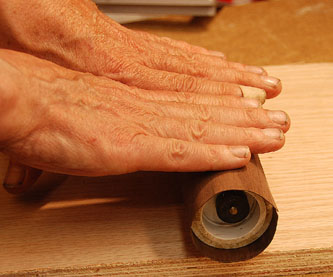
After pressing the edges of the seam firmly down onto the stock, roll it under pressure against a smooth clean surface.
Click Here to go to Part
2 of Wood Finish for Drone Mainstock.
Bottom of Wood Finish for Drone Mainstock Part 1 Page.