Ease of Kit Assembly Easy Kits for Starter or Half SetsI continue to recommend the kit versions for anyone on a tight budget, and for those who anticipate a long future in piping--especially children. They're a great and safe way to get to know the instrument mechanically right up front. You'll feel more in control of your Penny-Chanter set and you'll be a more discerning shopper, sooner, if you plan to move up to an expensive hand-made traditional set later. These kits are easy to assemble in an evening or two for novices with no piping experience and almost no craft or mechanical background. No machines or special tools are needed to complete them. Most of the steps left to the kit buyer were chosen because they represent maintenance procedures an owner of any fine uilleann pipe might do periodically or occasionally.There are manuals for each component needing assembly with detailed explanations, diagrams and photographs to make everything crystal clear. There's no better proof of ease of assembly than the fact I sold only kit sets for my first 7 years in business. If customer problems had been frequent I would have been swamped with support work. Details of the set kits and their individual components are given below. Chanter Kit and Advanced Kits for Starter or Half SetsThe Advanced Kits are the same as the Easy Kits, except that the chanter is not finished. It is provided in kit form with all its pieces cut to the critical lengths and shapes, but not glued together as detailed below. It is necessary to have access to a drill press and the ability to clamp the narrow cylindrical chanter for accurate drilling. The chanter kit does not require any musical instrument making experience but some shop and drill press experience are almost essential.Starter Set Kits Starter Set Easy Kit
Starter Set Advanced Kit
Half Set Kits Customer Photo of His Home-Assembled Half Set Easy Kit
Half Set Easy Kit
Half Set Advanced Kit
Penny-Chanter Kit What's In a Penny-Chanter Kit?
What tools are Required?
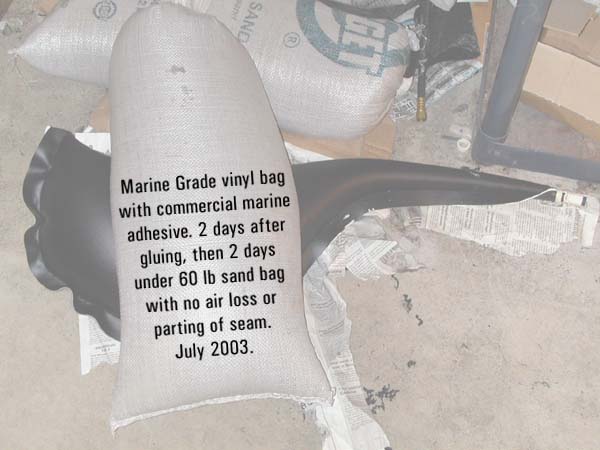
Vinyl or Optional Leather Bag Kit -- Improved Construction 2003 July Vinyl bags have been used in recent years by many pipers owning traditional instruments, including myself. Marine Grade vinyl bag and blowpipe/drones reinforcement patch already glued and airtight, plastic ivory-colored CPVC and brass stocks (sockets) for chanter and blowpipe included but not installed, decorative black corduroy cover material cut to shape but not stitched, decorative fringe for bag cover included but not stitched, waxed twine and blue tack putty for tying stocks into bag, scrap vinyl for repairs, plastic CPVC and brass bag blowpipe with valve installed, instruction sheet. Tools required: knife for cutting holes, trimming neck and cutting string. Hand or machine sewing equipment for assembling decorative bag. The optional leather bag kit is identical except for the air bladder itself being a sturdy bagpipe grade airtight black leather. My leather bags are glued rather than stitched, using a wraparound seam on the side away from the piper's body with an extra reinforcing layer covering the structural seam. The leather bag is definitely more expensive but is the best choice for half sets and longterm heavy use. Click Here to see Vinyl Bag Kit. Note, the bags are now built finished-side out with the reinforcing patch unfinished-side-out for best glue adhesion to the bag. Fabric is Marine Grade vinyl with sturdy polyester weave on unfinished side. Glue is now commercial grade marine adhesive. Click Here to see photo of test several days in progress of newly made inflated bag under heavy weight. Test was stopped after 3 days with no loss of air and no separation of the seam. The Real Wood and Leather Bellows Kit -- Easier Assembly 2004 September The bellows fabric must be real leather (in my opinion) because the constant extreme flexing. The small piece of leather only adds a few dollars to the cost of bellows otherwise made from vinyl and should last many years. The wood is a light colored poplar wood and the leather is black. The wood and leather are cut and glued together, treated airtight with bagpipe leather sealer, and the brass air-exit tube glued into place. NEW 09/2004: Wood is now fully finished: The leather bladder material is final-trimmed and the wood is varnished, making same-day assembly possible.The air intake valve assembly is assembled ready to be traditionally wrapped for a snug airtight joint. A long flexible clear plastic air supply tube with connecting pieces and reinforcing for the ends is included, along with brass tacks to reinforce the leather glue joint along the wood sides; a heavy leather hinge for the front of the bellows; stout black leather belts for the arm and waist punched and fitted with snaps; brass screws and washers for mounting belts and hinge; and a detailed insruction booklet well illustrated with photos and diagrams. Tools required: Phillips screwdriver and optional drill for mounting hinge and belts. Click Here to see Real Bellows Kit. Note only 1 bellows per kit. Finished bellows showed above as example, kit bellows shown below. Back to Home Bottom of Can I Build a Penny-Chanter Page |